One-Pot Italian Beef and Rice: Savory and Cheesy
- Time: 5 min active + 22 min cook
- Flavor/Texture Hook: Savory, cheesy, and velvety
- Perfect for: Busy weeknight dinners or budget-friendly meal prep
- Italian Beef and Rice
- Secret to the Flavor
- Detailed Recipe Specs
- All Necessary Ingredients
- Essential Kitchen Gear
- Step-by-Step Cooking Process
- Common Pitfalls and Tips
- Smart Dietary Changes
- Scaling the Batch
- Truth About Rice Myths
- Storage and Waste Tips
- Final Presentation Ideas
- Recipe FAQs
- 📝 Recipe Card
I remember the first time I tried making a version of this in my early twenties. I was convinced that "simmering" just meant putting everything in a pot and hoping for the best. I threw the raw beef, rice, and broth together in one go. The result? Gray, boiled looking meat and rice that felt like wet cardboard.
It was edible, but it had zero soul. I realized later that the heart of this dish isn't the ingredients themselves, but the order in which they hit the pan.
That's the thing about Italian American comfort food. It's all about those deep, concentrated flavors that usually take hours to develop. But when you're staring at a clock on a Tuesday night, you don't have four hours to let a pot bubble.
You need something that hits those same notes garlic, oregano, and rich beef in under half an hour.
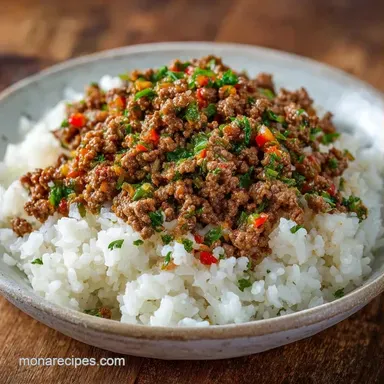
This Italian Beef and Rice is my answer to that rush. It’s a dish that feels like a hug in a bowl, blending the richness of a slow cooked stew with the convenience of a skillet meal. It's not about fancy techniques, just about doing the basics right so the flavors actually pop.
Italian Beef and Rice
The real magic here is the contrast. You have the sharp, salty hit of parmesan, the gooey pull of mozzarella, and the earthy base of the beef and rice. It's the kind of meal where you don't need a side dish because it's already a complete package.
I've spent a lot of time tweaking the liquid amounts because rice can be finicky. Too much broth and you've got soup; too little and you're eating pebbles.
We're aiming for that sweet spot where the rice is fully cooked and fluffy, but still holds its shape. By using a tight fitting lid and low heat, we create a mini steam chamber. This ensures the grains absorb all that beefy, tomato infused broth without breaking down.
It’s a simple process, but when you get it right, the result is a velvety texture that feels way more expensive than it actually is.
Secret to the Flavor
I used to think the spices did all the heavy lifting, but it's actually the process of layering. When you brown the beef until it's almost a dark brown, you're creating a layer of flavor on the bottom of the pan that you just can't get from boiling.
The Browning Effect: Searing the beef at high heat creates complex flavor compounds that act as the foundation for the whole dish. If you skip this, the meat tastes bland and the sauce lacks depth.
Tomato Paste Caramelization: Frying the tomato paste for a couple of minutes before adding liquid removes the "raw" metallic taste. It turns the paste into a rich, sweet concentrate that thickens the sauce naturally.
Starch Absorption: Long grain white rice is chosen because it absorbs liquid without releasing too much starch. This prevents the Italian Beef and Rice from becoming gummy, keeping the grains distinct.
Controlled Steam: Using a heavy lid traps the moisture, allowing the rice to cook evenly. This means the top layer doesn't dry out while the bottom layer is still raw.
| Method | Time | Texture | Best For |
|---|---|---|---|
| Skillet (Fast) | 27 mins | Fluffy & Moist | Weeknight dinners |
| Oven Bake (Classic) | 60 mins | Crusty & Dense | Sunday family meals |
| Slow Cooker | 4-6 hours | Very Soft/Stew like | Set and forget prep |
Detailed Recipe Specs
When you're working with ground beef, the fat content matters. I usually go for 80/20 or 85/15. If you go too lean, the dish can feel dry. If you go too fatty, you'll end up with an oil slick on top of your rice. According to USDA FoodData, the fat in beef helps carry the fat soluble flavors of the dried oregano and basil, which is why we don't want to drain every single drop of grease.
The beef broth is another area where you can make a big difference. Low sodium is the way to go here. Between the parmesan cheese and the tomato paste, there's already a lot of salt. Using a low sodium broth allows you to control the seasoning yourself.
If you use full sodium broth, the dish often ends up tasting like a salt lick by the time the rice absorbs the liquid.
The rice choice is non negotiable if you want that specific texture. Long grain white rice, like jasmine or basmati, works best. These varieties don't stick together as much as short grain or arborio rice.
If you use a short grain rice, you're basically making a risotto, which requires a completely different stirring technique and much more time.
All Necessary Ingredients
I've kept this list focused on budget friendly staples. You probably have half of this in your pantry already. For the beef, I recommend a standard lean ground beef, but you can swap it for turkey if you're watching calories.
- 1 lb ground beefWhy this? Provides the rich, savory base and essential fats. (Substitute: Ground turkey or lean pork)
- 1 small yellow onion, finely dicedWhy this? Adds a subtle sweetness and aromatic depth. (Substitute: Shallots for a milder taste)
- 2 cloves garlic, mincedWhy this? Essential for that classic Italian aroma. (Substitute: 1 tsp garlic powder)
- 1 tbsp olive oilWhy this? Prevents sticking and helps browning. (Substitute: Butter or avocado oil)
- 1 cup long grain white rice, uncookedWhy this? Absorbs flavor without getting mushy. (Substitute: Parboiled rice for more bite)
- 2 cups beef broth, low sodiumWhy this? The primary cooking liquid for the rice. (Substitute: Chicken broth or water with a bouillon cube)
- 1 can (14.5 oz) diced tomatoesWhy this? Adds acidity and chunks of texture. (Substitute: Crushed tomatoes for a smoother sauce)
- 2 tbsp tomato pasteWhy this? Thickens the sauce and adds concentrated color. (Substitute: Extra diced tomatoes, though sauce will be thinner)
- 1 tsp dried oreganoWhy this? The signature "pizza" herb flavor. (Substitute: Dried Italian seasoning mix)
- 1 tsp dried basilWhy this? Adds a slightly sweet, peppery note. (Substitute: Fresh basil added at the end)
- 1/2 tsp red pepper flakesWhy this? A tiny kick to cut through the richness. (Substitute: A pinch of cayenne or omit for kids)
- 1/2 tsp saltWhy this? Enhances all other flavors. (Substitute: Adjust based on broth saltiness)
- 1/4 tsp black pepperWhy this? Basic flavor balance. (Substitute: White pepper)
- 1 cup shredded mozzarellaWhy this? For that classic melted cheese pull. (Substitute: Provolone or Monterey Jack)
- 1/4 cup grated parmesanWhy this? Adds a sharp, salty punch. (Substitute: Pecorino Romano)
- 2 tbsp fresh parsley, choppedWhy this? Brightens the look and taste. (Substitute: Dried parsley, though less vibrant)
| Original Ingredient | Substitute | Why It Works |
|---|---|---|
| Ground Beef (1 lb) | Ground Turkey (1 lb) | Leaner protein. Note: Needs a bit more olive oil since turkey is leaner |
| Long grain Rice (1 cup) | Brown Rice (1 cup) | Higher fiber. Note: Requires 1/2 cup more broth and 20 mins more cook time |
| Beef Broth (2 cups) | Chicken Broth (2 cups) | Similar savory profile. Note: Lighter flavor, less "beefy" |
| Mozzarella (1 cup) | Provolone (1 cup) | Similar melt. Note: Stronger, tangier taste |
Essential Kitchen Gear
You don't need a fancy setup for this, which is why it's a great beginner recipe. The most important tool is a 12 inch skillet with a tight fitting lid. If your skillet doesn't have a lid, you can use a large baking sheet or a piece of foil, but a real lid is much better at trapping steam.
I prefer a stainless steel or cast iron skillet because they hold heat better. Non stick is fine, but you won't get that same deep mahogany brown on the beef. The "fond" those little brown bits that stick to the pan is where the flavor lives.
When we pour in the broth, we scrape those bits up, and that's what makes the sauce taste professional.
A sturdy wooden spoon or a silicone spatula is essential for scraping the pan. You'll also want a fine mesh strainer if you're rinsing your rice, though for this specific Italian Beef and Rice, some people prefer not to rinse to keep a bit more starch for the sauce's thickness.
Step-by-step Cooking Process

Right then, let's get into the actual cooking. The key here is patience during the browning phase. Don't rush the beef.
Phase 1: The Flavor Foundation
- Heat olive oil over medium high heat in a 12 inch skillet. Add the ground beef and onions, cooking until the beef is deep mahogany brown and onions are translucent. Note: Avoid stirring too often; let the meat sear for 3-4 minutes first.
- Stir in the minced garlic and cook for 60 seconds until it smells fragrant. Drain excess grease if you have a lot of it, but leave about a tablespoon for flavor.
- Stir in tomato paste and cook for 2 minutes until the paste turns a darker red and smells toasted. Add dried oregano, basil, red pepper flakes, salt, and pepper.
Phase 2: Building the Sauce
- Pour in the diced tomatoes and beef broth. Use your spoon to scrape the bottom of the pan until all the browned bits are released into the liquid. Bring the mixture to a gentle bubble.
- Stir in the uncooked rice. Make sure every grain is coated in the sauce so they cook evenly.
Phase 3: The Controlled Simmer
- Reduce heat to low and cover with a tight fitting lid. Simmer for 18–20 minutes until the liquid is completely absorbed and the rice is tender. Note: Do not lift the lid to peek! You'll let the steam out and the rice will stay crunchy.
Phase 4: The Cheesy Finish
- Remove the skillet from the heat. Sprinkle mozzarella and parmesan evenly over the top.
- Cover the pan for 2 minutes until the cheese is melted and bubbly.
- Garnish with chopped fresh parsley and serve immediately.
Chef's Note: If you want an even cheesier experience, stir half of the mozzarella into the rice before adding the top layer. It creates little pockets of melted cheese throughout the dish.
Common Pitfalls and Tips
Even with a simple recipe, things can go sideways. Usually, it comes down to heat management or the lid.
Crunchy Rice Issues
If your rice is still hard after 20 minutes, you likely have a leaky lid. Steam is escaping, and the rice isn't hydrating. You can fix this by adding 1/4 cup of broth, tightening the lid (or adding a heavy weight on top), and simmering for another 5 minutes.
Greasy Beef Fixes
If you see a layer of oil on top of your Italian Beef and Rice, you probably didn't drain enough fat after browning. Next time, use a spoon to remove the excess oil before adding the tomato paste. In a pinch, you can blot the top of the finished dish with a clean paper towel.
Mushy Rice Causes
Mushiness happens when you stir the rice too much during the simmer or use too much liquid. Rice releases starch when stirred; if you treat it like a risotto, it will turn into porridge. Once that lid goes on, leave it alone.
| Problem | Root Cause | Solution |
|---|---|---|
| Rice is too dry | Steam leaked or heat too high | Add 1/4 cup broth and re simmer |
| Sauce is too thin | Not enough tomato paste or simmered too long | Simmer 2 mins without lid before adding cheese |
| Beef is gray | Not enough heat during browning | Use medium high heat; don't crowd the pan |
Common Mistakes Checklist:
- ✓ Did you brown the beef until it was dark brown (not just gray)?
- ✓ Did you caramelize the tomato paste for 2 minutes?
- ✓ Did you leave the lid closed during the entire simmer?
- ✓ Did you use long grain rice instead of short grain?
- ✓ Did you scrape the browned bits (fond) off the bottom?
Smart Dietary Changes
Depending on who you're feeding, you might need to pivot. If you're looking for something lighter, I highly recommend my low carb ground beef recipe, which swaps the rice for a cheesy vegetable base.
For those avoiding gluten, this recipe is naturally gluten-free as long as your beef broth is certified. Always check the label on the broth, as some brands use yeast extract or thickeners that contain gluten.
If you want to pack in more nutrition, you can easily add diced carrots or frozen peas. Add the carrots in with the onions at the start, and stir the peas in during the last 2 minutes of simmering. This adds color and vitamins without changing the core flavor profile. For another hearty option, you might enjoy a ground beef rice skillet which uses a similar base but different seasonings.
Scaling the Batch
When you're cooking for a crowd, you can't just double everything blindly. Spices and liquids don't always scale linearly.
Scaling Down (1/2 Batch): If you're just cooking for two, use a smaller 8 inch or 10 inch skillet. Reduce the cooking time by about 20% since there's less mass to heat up. Use 1/2 cup of rice and 1 cup of broth.
Scaling Up (2x Batch): When doubling, do NOT double the salt and red pepper flakes. Increase them by about 1.5x instead. Too much salt becomes overwhelming in larger batches.
Also, you may need to reduce the beef broth by about 10% (use 3.5 to 3.75 cups instead of 4) because less moisture evaporates from a larger, denser mass of rice.
Baking Version: If you want to turn this into an Italian Beef and Rice bake, transfer the mixture to a 9x13 baking dish after step 5. Lower your oven to 350°F (175°C) and bake for 30-35 minutes.
The result is more like a casserole with a slightly firmer texture.
Truth About Rice Myths
There's a lot of conflicting advice online about how to handle rice. Let's clear a few things up.
Myth: You must rinse rice to remove arsenic. While rinsing removes some surface starch and a tiny bit of arsenic, for long grain white rice in a skillet meal, it's optional. In this recipe, keeping a little starch actually helps the sauce cling to the grains.
Myth: Searing meat seals in the juices. This is a common misconception. Searing doesn't create a waterproof barrier. Instead, it creates flavor. The moisture loss happens regardless, but the trade off for that deep, savory crust is 100% worth it.
Myth: Using "brown rice" just means more time. It's not just more time; it's a different texture. Brown rice has a bran layer that doesn't absorb liquid the same way. If you use it, you'll need more broth and a significantly longer simmer, or the grains will stay chewy.
Storage and Waste Tips
This dish is a meal prep dream because it actually holds up well in the fridge.
Fridge Storage: Store in an airtight container for up to 4 days. The rice will absorb more of the sauce over time, so it might seem drier when you reheat it.
Freezing: You can freeze this for up to 2 months. I recommend freezing it before adding the cheese. To thaw, let it sit in the fridge overnight, then reheat in a pan with a splash of water or broth to bring back the moisture.
Reheating: The best way to reheat is on the stovetop over low heat with a tablespoon of water. Cover it with a lid to steam the rice back to life. A microwave works too, but it can make the rice a bit rubbery.
Zero Waste Tips:
- Onion Scraps: Save your onion peels and garlic ends in a freezer bag to make homemade vegetable broth later.
- Tomato Can: Don't throw away the leftover tomato juice in the can. Stir it into the pan during step 4 for extra flavor.
- Parsley Stems: Finely chop the parsley stems and sauté them with the onions. They have more concentrated flavor than the leaves.
Final Presentation Ideas
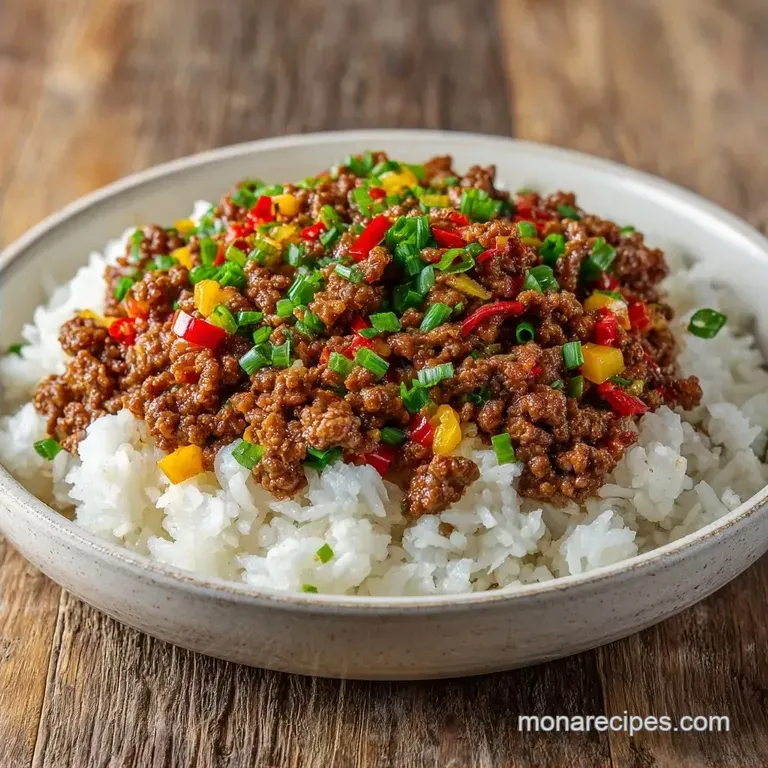
You eat with your eyes first, and a brown and beige dish can look a bit dull. The fresh parsley is non negotiable here that pop of green makes the whole thing look fresh.
For a more "restaurant" feel, serve the Italian Beef and Rice in shallow bowls. Top with an extra sprinkle of fresh parmesan and a drizzle of high-quality olive oil. If you have a lemon in the fridge, a tiny squeeze of fresh lemon juice over the top right before serving cuts through the richness of the cheese and beef, brightening the whole plate.
If you're serving this for a dinner party, place the skillet right in the center of the table. There's something about a bubbling, cheesy skillet that makes everyone feel welcome. Pair it with a simple arugula salad with a balsamic vinaigrette to balance the heartiness of the beef and rice.
Recipe FAQs
What are the ingredients in Italian beef and rice?
Ground beef, long grain white rice, beef broth, and diced tomatoes. The flavor is built with onion, garlic, tomato paste, oregano, basil, and finished with mozzarella and parmesan cheeses.
How do I cook Italian beef and rice in one pan?
Brown the beef and onions in olive oil over medium high heat. Stir in garlic and tomato paste, then add the diced tomatoes, broth, and uncooked rice, simmering covered for 18 20 minutes.
Is it true that I must cook the rice separately before adding it to the beef?
No, this is a common misconception. The uncooked rice simmers directly in the beef broth and tomato mixture, allowing it to absorb all the savory flavors.
How do I ensure the beef has the most flavor?
Cook the beef until it reaches a deep mahogany brown. This proper searing creates a rich flavor base before adding the aromatics and liquid.
What are some other ways to use ground beef for meal prep?
Experiment with different regional flavors like Korean or Mediterranean styles. If you enjoyed the efficiency of this one-pot meal, you can use the same batch cooking logic for a healthy ground beef prep.
How do I store and reheat leftovers without the rice becoming dry?
Store in an airtight container for up to 4 days. Reheat on the stovetop over low heat with a tablespoon of water or broth to bring back the original moisture.
How do I freeze this dish for later?
Freeze the mixture for up to 2 months before adding the cheese. Thaw in the fridge overnight and reheat in a pan with a splash of broth for the best texture.
Italian Beef And Rice