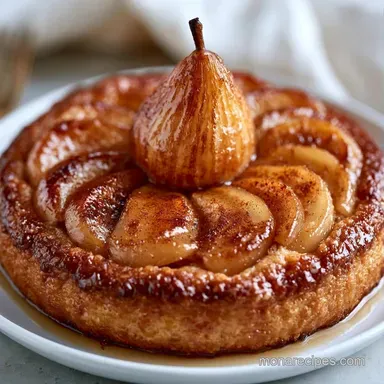
Pear Puff Pastry Tart with Cinnamon
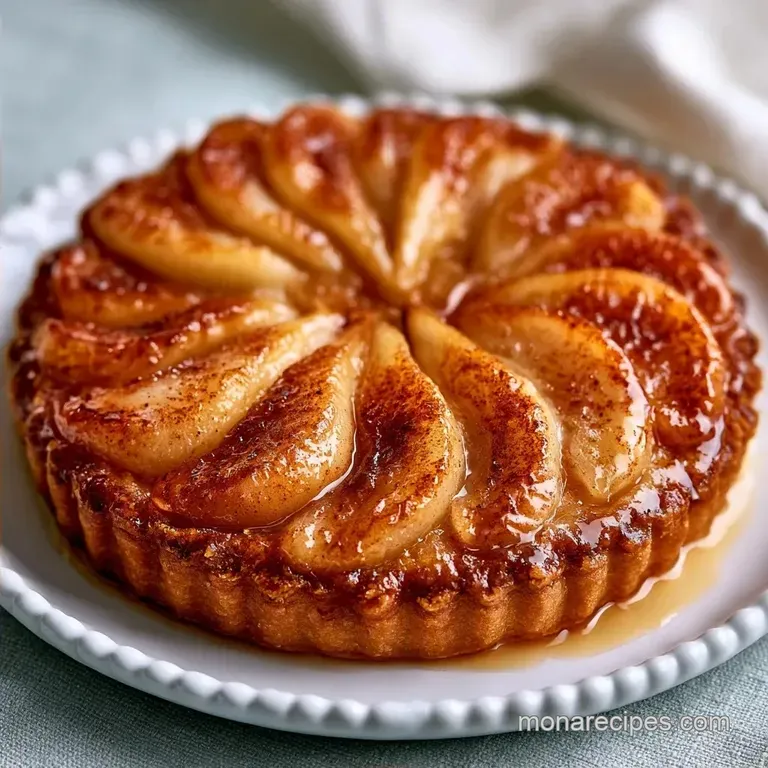
- Time: 15 min active + 30 min bake
- Flavor/Texture Hook: Shattering mahogany crust and syrupy pears
- Perfect for: A cozy autumn dinner party or a weekend treat
Easy Pear Puff Pastry Tart Guide
Imagine it is a rainy Tuesday in October. The house smells like cinnamon and melting butter, and you have a tray in the oven that is just starting to bubble and brown. I used to think these kinds of tarts were only for fancy French bistros where they charge you twenty bucks for a slice.
But once you realize it is mostly about managing moisture, you can make this in your own kitchen without the stress.
This recipe is all about that contrast. You get the crunch of the pastry, the softness of the Bosc pears, and a glossy finish that makes it look like you spent hours on it. It is a simple way to use up seasonal fruit while making something that feels special.
You can expect a tart that is crispy on the edges and tender in the middle. We aren't aiming for a stiff pie crust here, but rather a light, airy lift that supports the fruit. It is a reliable way to bring something impressive to the table without spending the whole day prepping.
What Makes This Work
Fruit Sautéing: Cooking the pears first removes excess water and concentrates the sugar. This stops the pastry from turning into a mushy mess under the fruit.
The Steam Lift: High oven heat turns the butter layers in the puff pastry into steam. This pushes the dough upward, creating those airy, shattering layers. If you've tried a Pear Tarte Tatin, you know how important that caramelization is for the base.
Essential Kitchen Gear
You don't need a professional studio to pull this off, but a few things make it easier. A heavy bottomed sauté pan is best for the pears so the sugar doesn't burn in one spot. You will also need a sharp knife to get those thin, uniform pear slices, which ensures they all soften at the same rate.
A baking sheet with a rim is a must. Since the butter in the pastry can leak a bit during the bake, the rim keeps your oven clean. Use parchment paper to prevent sticking and make the cleanup a breeze.
The Core Ingredients
Before we get into the list, let's look at why we chose these specific items.
| Ingredient | Role | If You Don't Have It |
|---|---|---|
| Bosc Pears | Hold shape when cooked | Anjou or Bartlett pears |
| Puff Pastry | Buttery, flaky base | Phyllo (requires more butter) |
| Brown Sugar | Deep caramel flavor | Maple syrup or honey |
| Apricot Preserves | Glossy, tart finish | Peach or apricot jam |
Now, here is the full list for your shopping trip.
- 680 g ripe Bosc or Anjou pears, peeled, cored, and thinly sliced Why this? Bosc pears stay firm and don't turn to mush.
- 30 g unsalted butter Why this? Provides the fat needed for the syrupy glaze.
- 50 g light brown sugar Why this? Adds a molasses note that pairs with cinnamon.
- 2 g ground cinnamon Why this? The classic warm spice for orchard fruits.
- 1 g salt Why this? Cuts through the sugar for a balanced taste.
- 480 g All-butter frozen puff pastry, thawed Why this? All-butter versions have better lift and flavor.
- 1 large egg Why this? Creates the golden brown color on the crust.
- 15 ml water (for egg wash)
- 30 g apricot preserves Why this? Gives that professional, shiny look.
- 15 ml warm water (for glaze)
Exact Recipe Specs
For those who love precision, here are the numbers. I've tested this to make sure the timing is tight.
| Metric | Value | Note |
|---|---|---|
| Oven Temp | 200°C (400°F) | Must be fully preheated |
| Bake Time | 25-30 minutes | Until mahogany gold |
| Prep Time | 15 minutes | Includes slicing pears |
| Yield | 8 servings | Based on one standard sheet |
To ensure success, keep these precision checkpoints in mind: sauté the pears for exactly 3-5 minutes, score a 2.5 cm border on the pastry, and pull the tart out the moment the edges hit that deep gold color.
Step-by-step Cooking Process
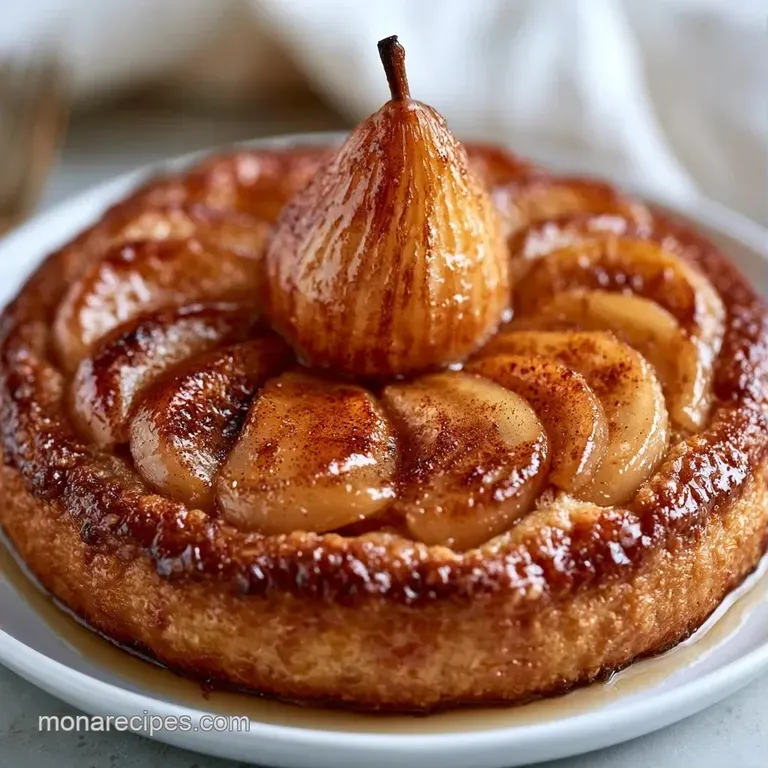
Sautéing the Pears
Melt the butter in a sauté pan over medium heat. Add the sliced pears, brown sugar, cinnamon, and salt. Cook for 3-5 minutes, stirring occasionally, until the pears are slightly softened and coated in a syrupy glaze.
Remove from heat and let them cool for a few minutes so they don't melt the pastry on contact.
The Pastry Base
Get the oven hot at 200°C (400°F). Roll out the puff pastry onto a parchment lined baking sheet. Use a knife to lightly score a 2.5 cm border around the edge, but don't cut all the way through.
Prick the center area several times with a fork to stop the middle from puffing up too much.
Assembling and Baking
Arrange the caramelized pears inside the border in a slightly overlapping shingle pattern. Beat the egg with 15 ml water and brush the outer border generously. Bake for 25-30 minutes until the crust has reached a deep mahogany gold and the pears are tender.
The Final Glaze
Mix the apricot preserves with warm water in a small bowl. Stir until the mixture is silky and smooth. Brush this over the warm tart for a professional finish.
Solving Common Issues
It is easy for things to go wrong when working with pastry, but most fixes are simple. If your pears are too juicy, they can leak into the dough. The trick is to let the sautéed fruit cool slightly before adding it to the pastry.
If the edges are browning too fast but the center is pale, your oven might have a hot spot. Rotate the pan halfway through the bake to ensure an even color.
Fixing Soggy Crusts
If the bottom isn't crisp, your oven temperature was likely too low. Ensure you use an oven thermometer to verify you are actually at 200°C.
Preventing Burnt Edges
If the border browns too quickly, shield it with a strip of foil for the last 5 minutes of baking.
Handling Tearing Dough
If the pastry tears while rolling, just pinch the edges back together with your fingers. It's a rustic tart, so a few seams won't be noticed once it's baked.
| Problem | Root Cause | Solution |
|---|---|---|
| Soggy bottom | Too much fruit moisture | Sauté pears longer or use a fork to prick the base |
| Pale crust | Oven temp too low | Check preheat time; use a higher rack |
| Pears sliding | Slices too thick | Slice pears to 3-5 mm thickness |
Scaling Your Batch
When you need to change the size, keep the ratios the same but adjust your gear.
For a smaller batch (half size), use a smaller baking sheet and reduce the bake time by about 20%. Since you only need half an egg, beat one egg in a cup and measure out 2 tablespoons.
For larger batches (2x), work in separate batches on different sheets. Do not crowd the pears, or they will steam instead of roast. If you are baking two tarts at once, lower the temp by about 10°C and extend the time by 5 minutes to allow for airflow.
Quick Decision Guide:
- For a crispier base: chill the rolled pastry for 15 mins before adding fruit.
- For deeper flavor: add a pinch of nutmeg to the cinnamon mix.
- For softer pears: slice the fruit slightly thinner.
Freshness and Waste
This tart is best eaten warm, but it keeps well if stored correctly. Keep it in a sealed box in the cooler for up to 3 days. When you're ready to eat it, don't use the microwave. Pop a slice in the oven at 175°C for 5 minutes to bring back the crunch.
For long term storage, you can freeze individual slices. Wrap them tightly in foil and plastic wrap for up to 2 months. Reheat directly from the freezer in a hot oven.
To reduce waste, don't toss the pear cores and peels. You can simmer them with a cinnamon stick and water to make a simple pear syrup for pancakes or oatmeal.
Tasty Flavor Twists
If you want to switch things up, you can easily modify the fillings. For a savory version, create a Pear Brie Puff Pastry Tart by adding slices of Brie cheese under the pears and skipping the brown sugar and cinnamon.
For a more complex fruit profile, try an Apple Pear Puff Pastry Tart. Mix half Bosc pears with half Granny Smith apples for a bit more tartness. This blend works similarly to an Apple Pear Crisp, providing a great balance of sweetness.
Mini Tartlets
You can make individual pear tart puff pastry by cutting the sheet into 10 cm squares. Follow the same scoring and filling process, but reduce the bake time to 15-20 minutes.
Poached Variation
If you have extra time, try a poached pear puff pastry tart. Poach the pears in vanilla and star anise first, then slice and bake. This adds a more sophisticated floral note to the dessert.
Best Ways to Serve
The most classic way to serve this is with a dollop of cold crème fraîche or a scoop of vanilla bean ice cream. The cold cream cuts through the richness of the butter and the sweetness of the glaze.
If you want something lighter, a few fresh raspberries or a sprinkle of powdered sugar on top looks great. For a drink pairing, a glass of chilled dessert wine or a hot Earl Grey tea complements the cinnamon and pear perfectly.
Trust me, the contrast of the hot tart and cold cream is the best part of the whole experience.
Recipe FAQs
Which pears work best for this tart?
Bosc or Anjou pears are the best choice. They maintain their structure and texture during the cooking process.
Would this tart work as a savory dish?
No, because the recipe uses brown sugar and apricot preserves. These ingredients create a sweet profile unsuitable for savory flavors.
How to assemble the pear puff pastry tart?
Roll the puff pastry onto a parchment lined baking sheet and score a 1 inch border. Arrange the caramelized pears inside and brush the edges with egg wash.
Is it true that homemade dough is necessary for a professional look?
Surprisingly, no. Frozen all-butter puff pastry creates a deep mahogany gold crust that looks high end.
Why brush apricot preserves over the pears?
This step provides a professional, glossy finish. Mixing the preserves with warm water ensures a smooth application.
What prevents the pastry from becoming soggy?
Prick the center of the dough several times with a fork. This allows steam to escape while the tart bakes at 400°F.
Pear Puff Pastry Tart